I really like the bright colors of this nursery I found while browsing through "Project Nursery".
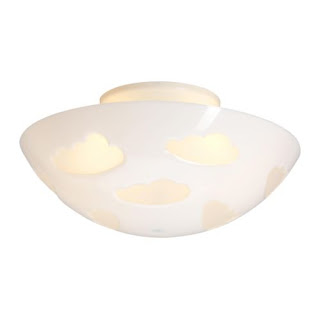
I saw the ceiling lamp at IKEA the other day:
MASKROS
Pendant lamp $49.99
Super cute but hubby didn't like it as much... I really love the simple decor of this room with a bright shade of aqua blue, green, and white! I definitely see my baby's room taking on these same colors.
Here's another ceiling lamp we liked but it's all out of stock... Not sure when IKEA will get more of these.
(We got two of these for the corner of the nursery. It can be used as a bookshelf or you can add plastic or wooden bins to neatly organize toys or even baby clothes/diapers) They were super easy to assemble and very light. If you have two or more pieces, you can easily rearrange them however you want. Side by side, one on each side of the bed/crib, or stack it like a bookshelf on top of each other. The beach wood color matches the color of our baby's crib and is a neutral color that pretty much goes with everything.
These boxes are $13-$15 dollars. A bit pricey for what they are but it can be a great storage unit for toys and other baby items you don't want showing.
Last night I decided to stop by Michael's craft store to buy wooden letters for Nathan's wall.
This Youtube video gave me some cool ideas for wood letter designs:
It was super easy and fun to make!
Materials you will need:
- Wooden letters (I got mine at Michaels for $1.99 a piece)
- Craft paper for .59 cents a piece
- Little wooden animals also .59 cents a piece.
- Elmer's clear glue
- Scissors
- Paint brush
- A pen or pencil to trace the letters with
(Here's a link to this month's coupons and discounts: http://weeklyad.michaels.com/stores/4720/coupons
Just make sure you check the dates! There is a 50% off all regular priced item coupon starting July 5-7. Pretty good if you are buying something more expensive.
First you trace the letters with the backside of your color paper.
Then you cut out the letter.
Using a paint brush, mix a little bit of Elmer's glue with a few drops of water. You want to lightly layer a coat of glue on the top of the wooden letter piece.
After putting on each individual letter, you want to let it dry for an hour or two.
You can put one more layer of glue over the top to seal in the paper. Make sure it's not too wet because you can rip the paper or make it ripple. Just a light layer of coating will do!
Let it dry again...
Then you can add cute little animals, beads, crystals, ribbons, stickers, (whatever extra embellishments you want)!
When you are done you can use ribbons or clear fish wire to hang your letters on your nursery wall!
Another easy craft idea you can do at home - Make your own decorative pillow!
Our last name sown onto a baby pillow with little buttons.
Aren't these shirts so cute?! "Mommy and Daddy loves me"... (I did not make these by the way haha)
We got this cute little car rug at IKEA for $4.99 and here's a baby blue MUNNY doll our friend Christina got us awhile back.
Here are some awesome websites to give you other fun and affordable ideas on how to decorate your own nursery!
http://www.chiccheapnursery.com/category/do-it-yourself/
http://projectnursery.com/


everything is coming together beautifully!
ReplyDelete